A slow website isn’t just frustrating for potential customers – it harms your search rankings and makes your site look unprofessional. Decreasing the number of HTTP requests that browsers make while loading one of your pages is an easy way to speed everything up without splurging on expensive hosting. There are plenty of tools you can use to figure out what kinds of requests your site is making and minimize the ones that aren’t needed.
An HTTP request is simply the way that a piece of content (an image or a stylesheet, for example) makes its way from your server to your users’ devices. When you load a page in your browser and something like an image needs to be loaded, your browser will make a request to the server hosting that file. Lots of small requests can take a long time to load compared to one larger request, because one round trip across the network often takes longer than the actual download.
Before you can reduce the number of requests that your website makes, you'll need to figure out where they’re coming from and how long each one takes. Conveniently, all major desktop web browsers offer developer tools that include network profiling functionality. To open DevTools in Chrome or Firefox, press F12 (or Cmd+Opt+I on macOS). You might be greeted with a face full of HTML tags and CSS selectors, but don’t be alarmed. Click the “Network” tab to open the network profiling tools.
Try opening another page on your site: you should see a list of requests, along with fields for, at least, status, domain, size, and time. In the waterfall chart at the right, you can see when each HTTP request started and finished loading.

To get a better idea of what a new visitor would experience when loading your website for the first time, try force-reloading your website (Ctrl+Shift+R or Cmd+Opt+R). This will prevent your browser from loading certain elements from its cache and force it to make actual HTTP requests for them. You can tell which requests were cached by seeing which rows say “memory cache” (Chrome) or “cached” (Firefox) in the “Size” or “Transferred” columns.
If mucking around in the DevTools simply isn’t your thing, you can use online services like Pingdom Speed Test to get most of the same information.
Now that you’ve figured out how many and what kinds of HTTP requests your site is making, you can get to work reducing them.
While most frontend frameworks will automatically minify and combine your JavaScript files for you, there might still be full-size scripts, stylesheets, and extra HTML lying around on your site that can easily be made smaller and combined. If you don’t have too many files to minify, you can paste each one into one of many online minifiers (just try searching for “minify js” on DuckDuckGo – they even have a tool built into the search results). Otherwise, the Autoptimize WordPress plugin can take care of that automatically.

While minifying code is critical for decreasing the amount of data browsers have to load, HTTP/2 makes it unnecessary to put all of your scripts and stylesheets into one file. With this newer HTTP standard, browsers can load multiple files in one request. HTTP/2 is faster in lots of other ways as well, so if you haven’t gotten around to updating your web server you should do so soon.
Redirect chains are when your site redirects to another page that in turn redirects to somewhere else. Besides using three or more requests to get one file, redirect chains make it harder for search engines to crawl your site and will decrease your rankings. It can be somewhat difficult to diagnose this issue just looking at the request statuses in the “Network” tab in DevTools, so some automated tools have the ability to detect redirect chains across every page on your website.
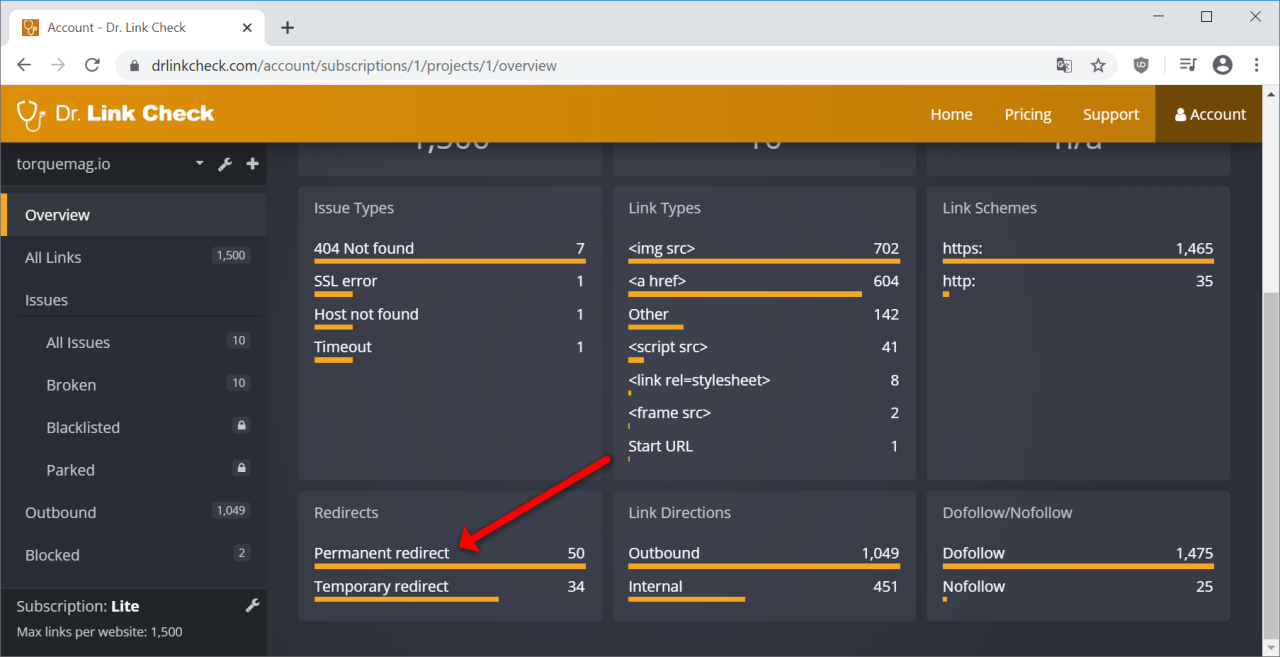
Dr. Link Check is primarily designed to find dead links and links that redirect to parked domains, but it can also find all the redirects and redirect chains by crawling your entire site. After running your website through Dr. Link Check, click on “Permanent redirect” in the “Redirects” section of the results.
WordPress makes it easy to add plugins and scripts to extend your site’s functionality, but loading each of these assets on every single page makes for slow loading times and high server load. The Asset CleanUp plugin lets you select which exact assets (scripts and stylesheets) load on each page, so you aren’t loading the CSS or JavaScript for a specific part of one page on every other page as well.
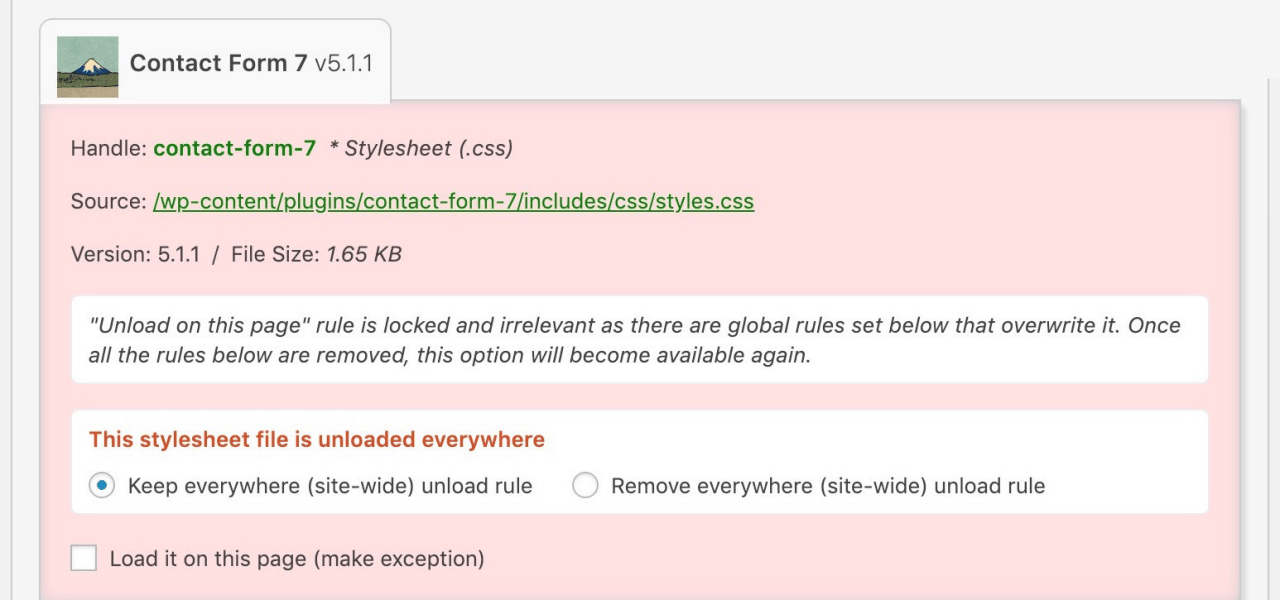
For example, without Asset CleanUp, your site might be forcing users’ browsers to download the scripts for a Contact Us widget on every single page, even if that widget is only actually being used on a single page. As you might expect, all those extra HTTP requests add up to make your website slower.
Your site might not just be making requests to your own server: external fonts, social media widgets, ads, and external images all load from other servers and can slow your website down significantly. While a fancy font from Google Fonts might look great, it also means that your website must load an additional file from another place on the web. If you still want to keep the font, think about disabling weights and variants that you aren’t currently using. It’s also recommended to avoid using external images. Hosting them yourself means that you aren’t at the mercy of another provider, and they can load much faster.
If you have long pages with lots of images on your site, loading all the images at once, even ones that the user can’t currently see, can take a while and cost you a lot of bandwidth. Instead, try lazy-loading your images using plugins like Smush or Optimole. This way, images only load once the user scrolls down to them instead of all loading when the page is opened. These plugins will also compress your images appropriately to make them load faster without compromising quality.
WordPress is not a static site generator, so whenever a user loads a page, the PHP process has to render that page just for that particular visitor. As you might expect, rendering the same exact page hundreds of different times is not very efficient. Plugins like LiteSpeed Cache and WP Fastest Cache allow WordPress to serve a page from cache instead of rendering it for each individual visitor, saving lots of time.
CDNs (content delivery networks) are services that let you offload some HTTP requests (usually images and other assets) to fast servers located near your users. These services usually also perform some caching themselves, decreasing the number of HTTP requests made to your origin server. By configuring your site to proxy through a CDN like Fastly or KeyCDN, big assets will be served by the CDN’s servers instead of yours.
A common cause of a slow website is an abundance of unnecessary HTTP requests. It’s easy to find out where requests are coming from with the developer tools built into your browser. Given that each request takes a certain amount of time to be returned, you can make your site much faster by reducing the total number of requests, reducing redirect chains and external requests, lazy-loading images, and caching content on your server and on a CDN. Even if you have already taken care of most of the low-hanging fruit, it’s good to occasionally review the requests your site is making whenever it feels slower than usual.
